OpenDingux release 2019.04.30

Hi folks,

Here is the first release of the official OpenDingux firmware for the RS-90 (RetroMini). The root FS is based on Buildroot 2019.02.1, the Linux kernel is based on 5.1-rc5.

Download links

The flasher can be downloaded here: Flasher tool download

The toolchain (for developers) can be downloaded here: Toolchain download

Additionally, for Windows users the drivers required for the flasher tool can be obtained here: Windows drivers download

All the sources can be found on the Github page of the OpenDingux project.

DISCLAIMER

Flashing OpenDingux to your RetroMini will permanently remove the native OS, all the games it contains, as well as your savegames. I cannot be held responsible for any damage that this software causes to your RetroMini device or the software it contains. Use it as your own risk.

How to flash

Attention: This flasher has been mostly tested under Linux, and it seems to be a hit-or-miss on Windows. If you cannot flash from Windows, try it from a Linux live-CD.
  1. With the device powered OFF, connect it to your PC through USB.
  2. Power it ON while pressing A. If done properly, the device will now be in USB Boot mode. On Windows, to continue to the following step you will need to have the driver properly installed.
  3. Extract the ZIP of the flasher tool to a directory. On Linux, run flash.sh from the terminal. On Windows, double-click on flash.bat.
  4. The RetroMini should power up, and show the welcome notice of the flasher tool. To continue, just follow the instructions. The flash operation should take a few minutes.
  5. After the installation completed and the device rebooted, OpenDingux has been successfully installed.

Usage

Those who already used a handheld running the official OpenDingux firmware (Dingoo A320 or GCW Zero) will feel at home. The firmware makes uses of the GMenu2X user interface, and OPKs as the format for the applications.

  • The firmware is standalone, and does not come with games nor emulators. These will need to be installed separately.
  • For file transfers, you can either use a FTP software and connect to 10.1.0.2 (anonymous login). Alternatively, you can use a SSH client and connect as the od user. The default password is odrocks.
  • The games or ROMs should be transferred somewhere inside the home directory or a subfolder. The OPK files must be placed inside the data/apps subfolder in order to appear in the menu.
  • The firmware supports overclocking the CPU. A list of frequencies are provided, from 216 MHz to 456 MHz, but I cannot guarantee that your RetroMini will be able to overclock that much. Mine does, though. To choose the frequency at which an application should run, select it in the menu, press SELECT then Edit; the frequency can be selected through the "Clock frequency" setting. Of course, overclocking will reduce the battery life. On the other hand, underclocking will increase the battery life. The default frequency is 360 MHz.

Final words

This project represents more than four hundred hours of work just on my side, all for free. If you value my work, please consider sending me a tip via PayPal using the "Donate" button on the top-right coner of my blog (or if you're on mobile, at the bottom of the page).

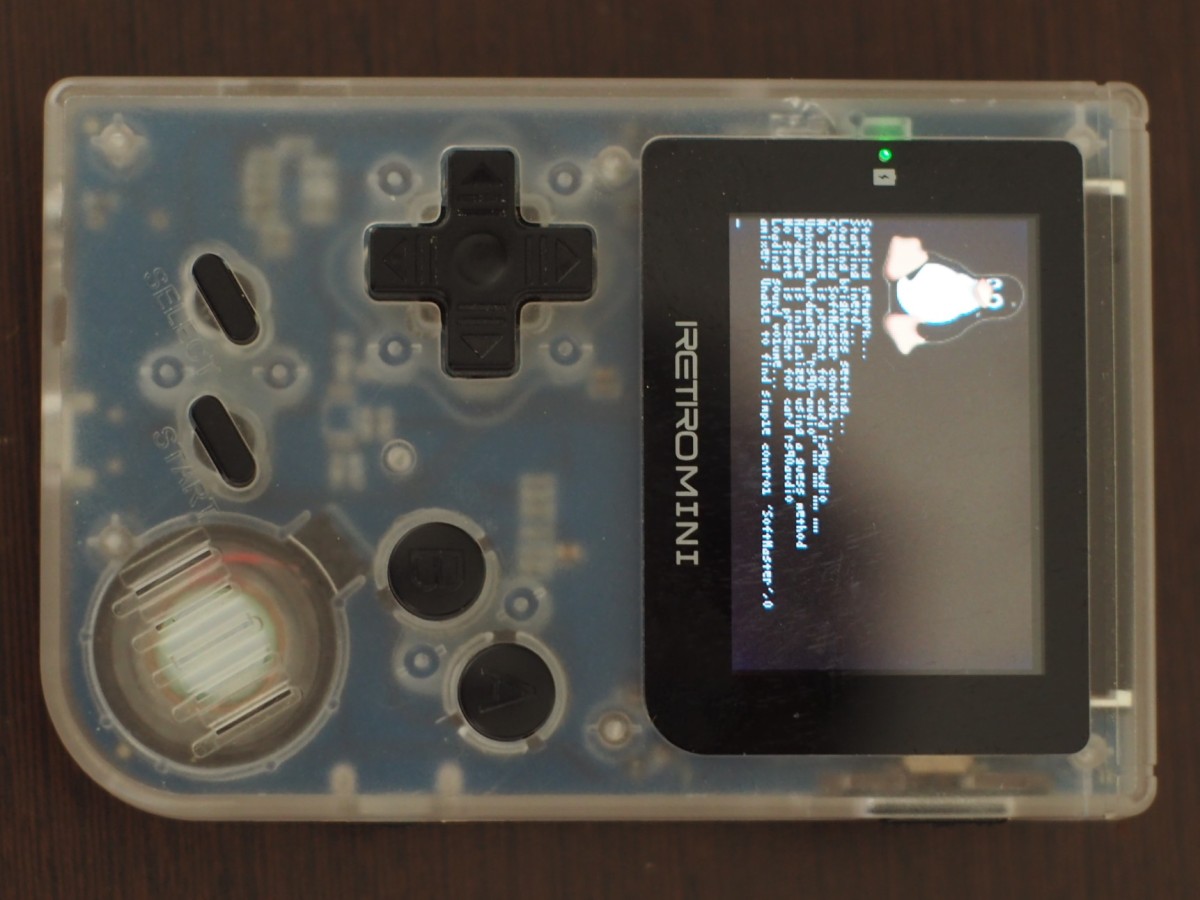
One picture is better than a thousand words

There are still some bugs here and there, but the kernel now supports all the hardware of the RS-90: mth got the LCD screen working, I worked on getting the sound output, USB networking, and NAND support in the bootloader, and zear worked on a ADC driver for the SELECT (and apparently, L) button, and a driver for the battery.

The focus now is to bring a GUI for this little handheld. We could use GMenu2X, but we need a new theme for the 240x160 screen. Also, we need to create an installer to automatize installation of the custom firmware from USB, just like in the good old Dingoo A320 days.

But now I can play Pokémon again, and under ReGBA this time 😀

New year, new blog

At the beginning of July last year, I started to create my devblog. At that moment, everything web-related was completely out of my world. I could code a bootloader or a real-time OS in C/C++, yet I wouldn't be able to make even a basic website. So I took the easy way. I registered my domain, bought three years of the cheapest VPS provider I could find, and installed a ready-made blog solution, the ubiquous Wordpress. The only real customization I did, was to write a theme - or should I say, download an existing one, and rewriting the CSS part.

It was running well, until it did not anymore. I'm new to this, so I didn't know that it is a terrible idea to buy three years worth of VPS service to a company that nobody knows. It turns out the provider, Hiformance, went bankrupt (or just ran away with the money), shutting down all the servers without notice.

So my blog was gone. Of course, I didn't have any backup. I could thanksfully recover most of it with the help of my browser cache, and the Wayback Machine. I got back the blog posts, comments, images, and CSS stylesheet. I don't like doing the same thing twice, though, so I decided not to buy another VPS service just to run a Wordpress instance. This time, I would write my website from zero, and learn in the process.

One of the less-known features of Github / Gitlab, is that these code hosting services can host for free a simple static website. It's as simple as pushing your HTML and assets to a branch named 'gh-pages' (or simply 'pages' on Gitlab). Then, your website appears at https://myname.github.com/myproject/. Very useful for hosting simple web pages for your projects. It is, however, much harder to have it host complex websites, such as a blog, for the simple reason that you cannot run a server language like PHP or a database on their servers. You're just left with HTML and Javascript.

Enters Jekyll

In a nutshell, Jekyll can be described as a static website generator. Write up rules about how your pages should look, give it text written in Markdown or plain HTML, and it will generate a static website from that. New blog post? Add the text of the post to a Markdown or HTML file, regenerate the website, push the generated HTML files to Github, and your new blog post is live. Actually, it's even simpler than that: Github's simple hosting service supports Jekyll natively, so just push your sources to the gh-pages branch instead of the generated HTML, and Github will auto-generate the static website from your Jekyll sources. How cool is that?

One last part that's left to do: comments. The first problem: this requires a server-side program to get the data submitted by the user through the HTML form. The second problem: How do you get this data integrated into your website, if your website is a set of static pages generated from a git repository?

Enters Staticman

Staticman is a tool that has been designed specially for the purpose of handling comments in generated static websites. The way it works: you setup your blog post reply form to send the comments to the public instance of Staticman that they graciously offer free of charge (alternatively, you can also run your own instance on your server). Second step, you add 'staticmanapp' as a collaborator to your website git repository. Then, everytime someone posts a comment, 'staticmanapp' will send you a pull request, adding the new comment in a file stored in a preconfigured directory. Merge it, let Github automatically regenerate the website, and your new comment will appear. Pretty nice, right?

Bottom line

So it took a bit of effort, but now my devblog is live again. It looks the same, but has been entirely written from scratch this time, not by just tweaking a Wordpress theme. And you know what? I'm glad I did. I learned a lot in the process. Also, I really got used to write my blog posts the same way I write my code. Fire up VIM, write some text, git-add, git-commit, git-push. Tweak the look-and-feel and content by writing code, instead of clicking buttons.

The best thing about that? You can now send me guests posts in pull requests ;)

Saving my Pokémons

The last few days I’ve been toying with the possibility of installing OpenDingux directly on the internal NAND. What I’ve been doing so far, was to boot the kernel from USB, and have it load the root filesystem (an unmodified OpenDingux rootfs for the Dingoo A320) from the SD card. It worked fine, but I had to unplug the SD card everytime I wanted to boot the kernel (required for booting over USB), and I didn’t like the idea of having proprietary software on the NAND.

Problem was, to be able to install OpenDingux on the NAND, I had to format the NAND first. And lose my savestate of Pokémon Emerald, on which I spent more than 30 hours.

After figuring out the changes needed to the memory controller and the NAND controller, I was able to make a full dump of the NAND directly to the SD card, complete with Out-Of-Band (OOB) data (that’s the part that contains meta-data, like error correction codes). I then got the BCH (error correction) controller to work, so I could make a dump of the NAND without the OOB.

The problem is that a dump of the NAND is useless if you don’t know how the data is stored.

NAND flashes are very prone to wear. Each eraseblock (128 KiB of data) can be written only about 1000 times before it starts to fail. To counter this issue, the OS has something called a Flash Translation Layer (FTL). It is basically a table that maps logical eraseblocks to physical eraseblocks. With the FTL, if you store a MP3 on the NAND, your OS will see the file as a continuous stream of bytes till the end of the file, but in reality each block of 128 KiB will be stored at a pseudo-random address somewhere in the whole NAND. If you overwrite the MP3 with another one, the file’s data will appear at the same address, but the new data written will be stored in completely different eraseblocks. The FTL is then a mechanism to prevent the damage done to the eraseblocks by repeated writting to the same files.

Back to my problem. By hex-editing the NAND dump I figured that the filesystem used was FAT16; the problem was that the filesystem lies on top of a FTL, so it was cut in 128 KiB pieces scattered across the whole NAND. I had to figure out a way to map each physical eraseblock to a logical eraseblock. Sure enough, by spending some time hex-editing, I figured out that the first page of each eraseblock starting from address 0x20000 had incorrect error-correction data in its OOB area. By looking closer, I could figure out that one 32-bit word contained a different number for each erase block: most likely that value corresponded to the logical erase block that was mapped to that physical erase block. And sure enough, after modifying the FTL driver that was used on the Dingoo A320 to fit the Retromini’s NAND, I could access the files and save my precious Pokémons!

Now, to finish this post, I have a good news and a bad news.

I’ll start with the good one: I cleaned and pushed my jz-4.18-retromini branch on Github. It contains all the work I did so far on the Retromini, including the FTL driver. By combining all the information I’ve written in this blog so far, it should be possible for other people to boot their own kernels.

The bad news: I know that will deceive some, but I think I’m done with this for this year. I’m about to start a 1800km walk, then probably travel in Spain and South America for a bit. My Retromini will stay at home, like my laptop.

Till next time!