We have nighties

For a few days now, we've had nightly builds of OpenDingux. Not exactly nightly, as they are not built once a day, but every time new commits are pushed.

This is a big deal; that makes it so much easier for non-devs to follow closely what's being done in the latest OpenDingux. It is particularly interesting for GCW-Zero users, which have been stuck with a 2014-era firmware for so long now, and can now update to something a bit more recent. This also allows us to get much more feedback on the current state of things, as well as bug reports.

The other important bit is that the GCW-Zero build now also supports the RG-350 and the RG-350M handhelds, so you can test the latest OpenDingux on these handhelds too.

As for what's new compared to the old 2014-era firmware, I will write a blog post soon with an in-depth review of all the changes that have been made for the last 6 years.

Disclaimer

I cannot stress more that the nightly builds are alpha quality and I cannot be held accountable for any damage caused to your handheld, your data, or yourself. If you're lucky it may not eat your data, but make a backup before updating, just in case.

As for functionalities, don't expect a fully-working build. A lot of work is yet to be done, and a lot of games don't run and will need to be adapted.

Download links

The latest OpenDingux nightly builds can be found at this permalink:
http://od.abstraction.se/opendingux/latest/

Note that the toolchains are not uploaded there. The latest RS-90 toolchain will still work on the nightly RS-90 builds. For the GCW-Zero build, the latest toolchain can be found here.

Cheers!

OpenDingux for RS-90 release 2020.10.04

Here is a new OS update for the RetroMini (RS-90). Note that it may very well be the last update for this handheld, since it is pretty much feature-complete, and as far as I can see, pretty much stable too.

Changelog

  • Based on Linux v5.9-rc7 and Buildroot 2020.08.
  • Fixed out-of-memory issues at boot.
  • Fix overall performance issues of the 2020-01-06 release.
  • Added support for paletted 8bpp.
  • Added support for the IPU. Only multi-planar YUV 4:4:4 can be used. This pixel mode can be used in SDL1 by calling SDL_SetVideoMode with bpp=24 and SDL_YUV444 set in the flags.
  • Fix quick key presses being missed.
  • ExFat-formatted SD cards are now supported.
  • zram swap now uses LZO as the compressor. It seems to be the one that gives the best performance overall.
  • And lots of cleanups that aren't noteworthy enough to appear on this list.

Download links

The update OPK can be downloaded here: OpenDingux 2020-10-04 update OPK.
You MUST be running the 2020-01-06 release to run the update.

An updated toolchain can be downloaded here: OpenDingux 2020-10-04 toolchain.
After extracting the toolchain, be sure to run the relocate-sdk.sh script, so that it can work from the directory you extracted it to.

Update on GCW-Zero / RG-350 OpenDingux ports

It's been a while since I last did a public update on the status of OpenDingux for the GCW-Zero. Believe it or not, a lot has changed since the last release in 2014 šŸ™‚. Truth be told, I never really stopped to work on it since 2014, and the folks on the Freenode IRC channel #opendingux can testify just how much work I've been doing.

Linux From Scratch

All the GCW-Zero specific code is gone. Everything has been moved to Device Tree now. Device Tree is a textual representation of all the hardware present in a device. This means that with the right Device Tree files, in theory it should be possible to boot a generic MIPS kernel (Debian anyone?) 
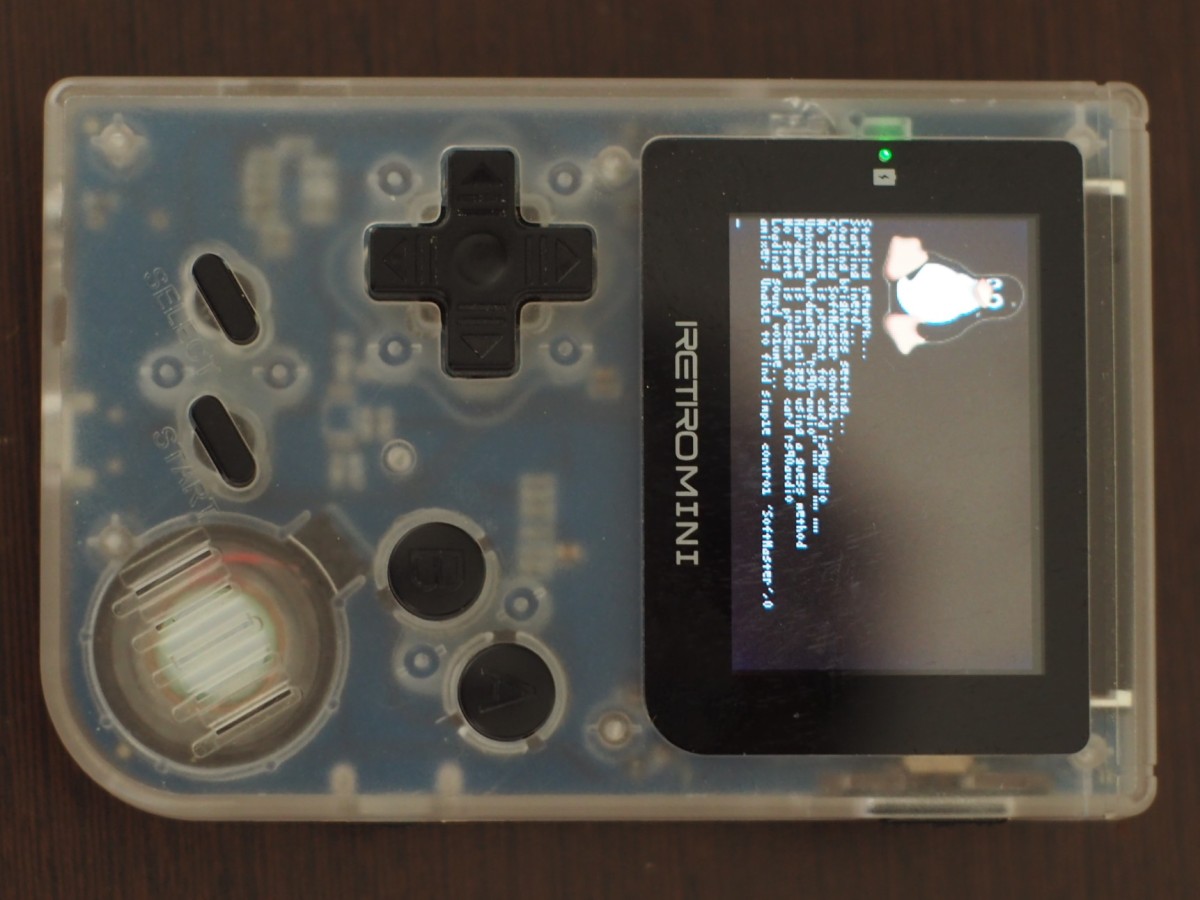
on both the GCW-Zero, the RG-350, the old Dingoo A320 and the RetroMini. How cool is that?

The Device Tree source file is divided in two parts, one SoC specific (JZ4770) and one device specific (GCW-Zero). At compilation time, these two source files are assembled into one single binary file, that will be either compiled into the kernel, or loaded by the bootloader.

If you are curious about what it looks like, this is the current Device Tree file for the GCW-Zero:

Without going as far as having one kernel to support all devices, this work will allow one single kernel to support both the GCW-Zero and the RG-350, as well as the other JZ4770 based handhelds, provided somebody write the devicetree for these (and the board-specific hardware, like the LCD screen, is supported by Linux). 
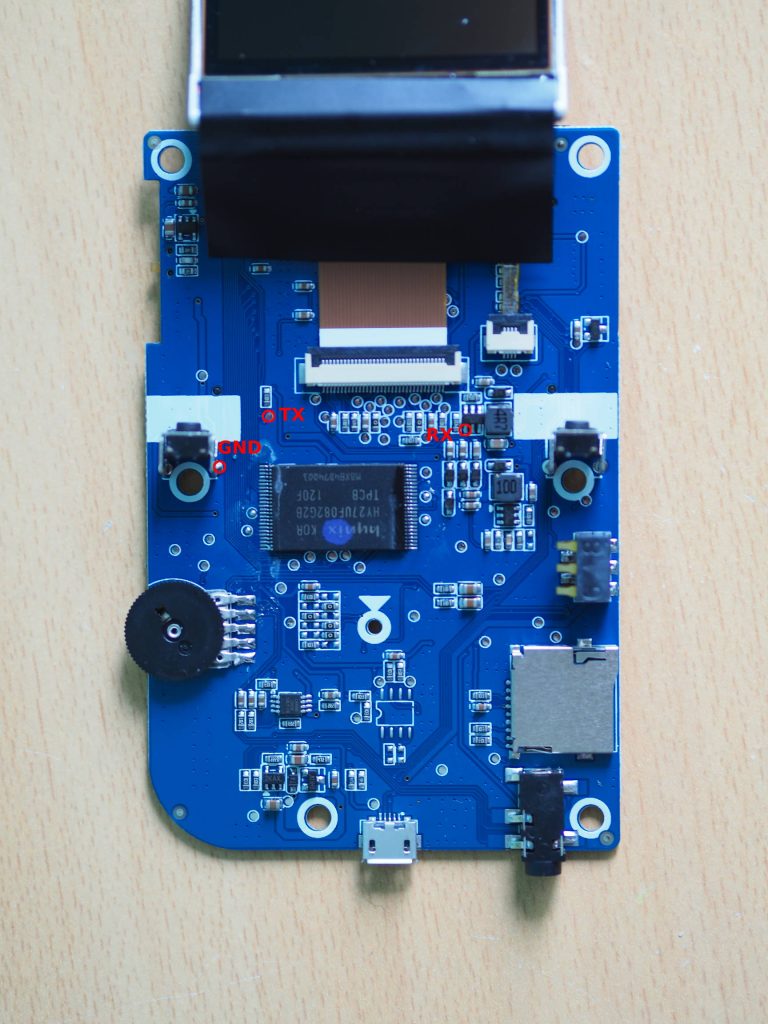
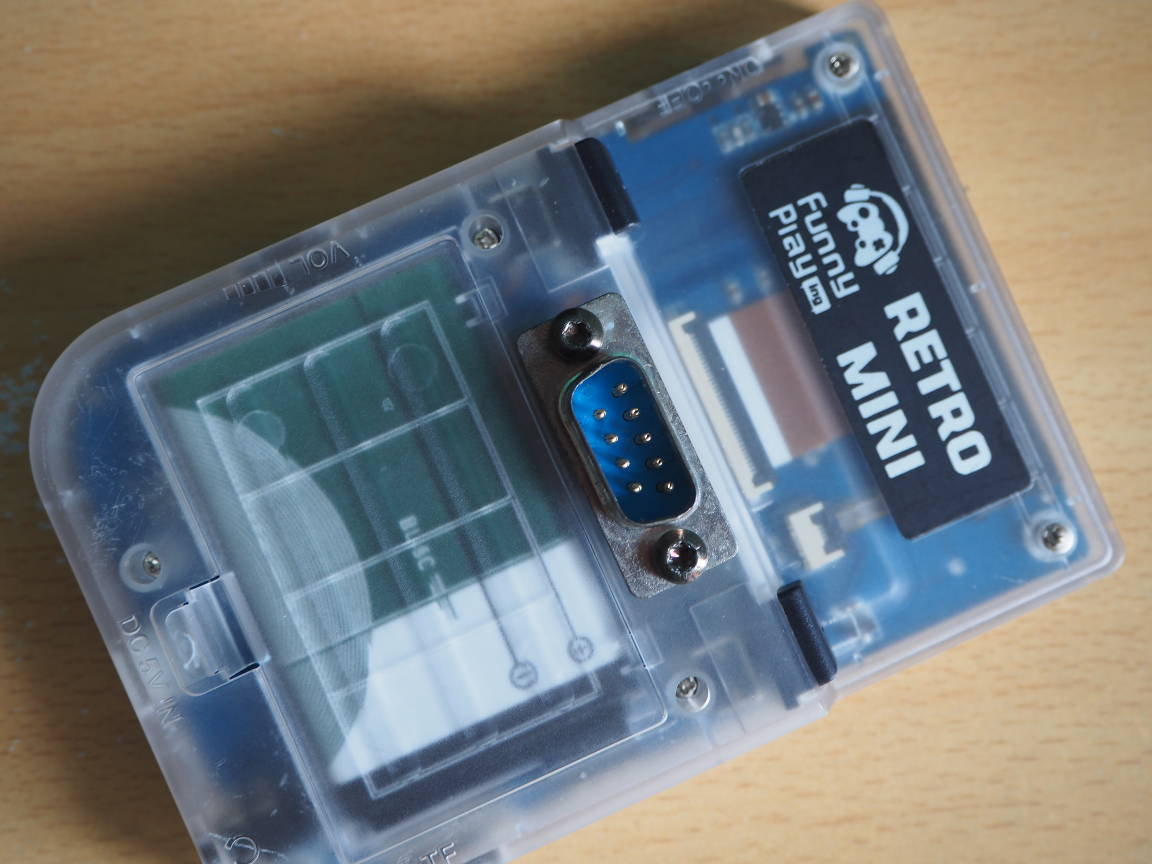
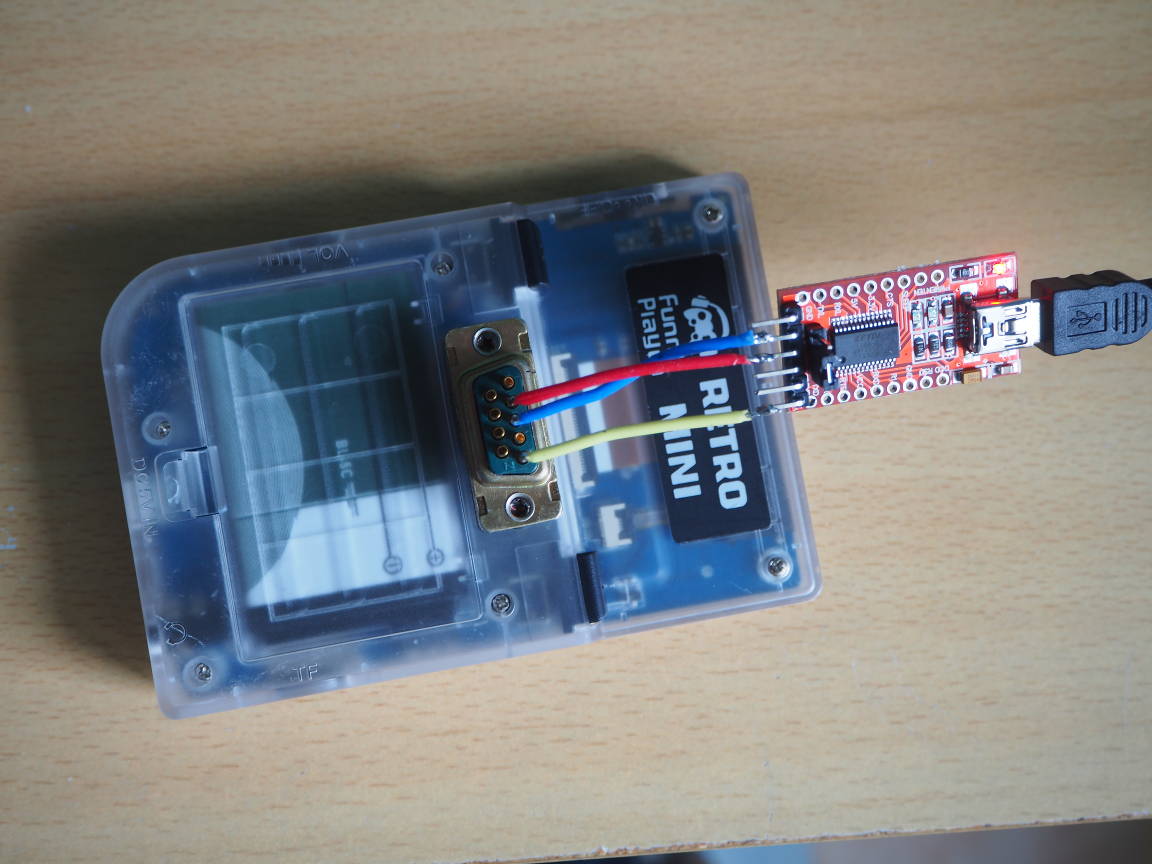
It will also allow to extend the flasher software that's been used to flash the RetroMini through USB, to be used to flash other handhelds as well, since the flasher is basically a Linux kernel with a small payload. We do not want users to have no choice but to crack open a device to flash the internal SD, when there is the option to flash from USB. Besides all of that, switching to Device Tree files was the only way to go to support the OpenDingux devices in the upstream Linux kernel; crappy platform-specific code is not welcome anymore in there.

For the same reason, most of the drivers that were in use in the old 3.12 kernel are gone, too. The clock code, timer code, and drivers for the MMC/SD, DMA, LCD and framebuffer, IPU, VPU, GPU, I2C, ADC, joystick, battery, USB, PWM and backlight, power regulator chip, I2S/AC97 and audio codec are brand new. The WiFi drivers are new too but weren't written by us. Of the old 3.12 drivers, only the watchdog, RTC and interrupt controller drivers are still around. Most of these new drivers now also support multiple Ingenic SoCs, and will work on the Dingoo A320 (JZ4740), the RetroMini (JZ4725B), and even the MIPS CI20 (JZ4780). They will most likely also work on the RS-97 (JZ4760) with very little work needed, if any.

This sums up to a total of 342 patches that have been accepted upstream, and about two dozens still in the process of being upstreamed, for a diff of about 15k lines added and 7.5k lines removed. This may not sound like much, but the process of upstreaming code to the Linux kernel is a long and complicated one. All these patches went under peer review and saw many revisions before being merged. To give an order of magnitude of the work involved, if we count all the intermediary states of these patches, it sums up to more than six thousand commits that were authored by me. In the meantime, I became the de-facto Linux kernel maintainer for Ingenic SoCs, which means that all patches that touch Ingenic specific code now have to go through me, and need my ack to go forward.

Current status

From a usability standpoint, the work on the kernel is pretty much done, almost every single feature of the 3.12 kernel is present in the current development kernel based on 5.7; the only exception being the "linkdev" feature, which allowed to map the face and shoulder buttons to joystick events, as it was simply impossible to upstream for being nothing more than a quick and dirty hack. With that said, the feature could very well be re-introduced at a different level, for instance as a feature within SDL itself; but the feature was never really used so dropping it shouldn't be a problem.

Since 3.12, new features were added, too. The IPU now supports a variety of RGB color formats (15/16/32-bit, RGB/BGR), packed YUV 4:2:2 and planar YUV 4:1:1, 4:2:0, 4:2:2, and 4:4:4. It now also scales with bicubic filtering with a configurable sharpness factor. Experimental support for HDMI was added as well, with support to resolutions up to 720p, a terrible image quality and no audio (for now). Support for hardware overlays has been added too, so it should be possible to have an overlay shown whenever something like the volume or brightness is modified. All the improvements that were made on the RS-90 port of OpenDingux are also present here, for instance a proper mass-storage mode using MTP, just like on Android, to replace the need for a FTP client.

As the kernel is pretty much complete, most of the work left concerns the userspace. Speaking about SDL, while IPU support is integrated into the kernel, the framebuffer emulation of the DRM/KMS core does not allow it to be used through the old fbdev API. As a result, SDL applications cannot yet use the IPU, but it's a problem that needs to be fixed in SDL, not in the kernel, either by adding a DRM/KMS backend to SDL, or by using a SDL-to-SDL2 compat library and using the DRM/KMS backend of SDL2 (which has its own share of challenges).

The second other point that needs work, is WiFi support. The old root filesystem of OpenDingux used ifconfig and iwconfig to configure the network, which have been deprecated for years now. The current root filesystem uses the newer iw tool, but the GCWConnect WiFi configuration tool wasn't updated yet to support it, and the overall performance and stability of wireless links is unknown.

The missing fish is USB OTG. This feature allows to plug USB peripherals like gamepads to the USB port. I think everyone who ever tried USB OTG on their GCW-Zero have had a hardware failure at some point, myself included. I understand the interest in having the handheld plugged to HDMI with a couple of gamepads connected, but that just won't happen on the GCW-Zero. I cannot take the risk of causing more hardware failures. This is however not a problem on the RG-350, which does not use USB OTG, but has a USB host port directly available as USB1. On the GCW-Zero, this USB host port is used internally to connect the WiFi chip.

On the RG-350, the only thing missing right now is support for the right joystick, but that's just a matter of cleaning up the existing code and integrating it properly into the new ADC driver.

Tasty numbers

For people worried about performance, the overhead of the OS is slightly lower, which means that games and emulators gain a few FPS with the 5.7 kernel vs. the old 3.12 kernel. When recompiled with the new toolchain, based on GCC 9, there is an extra small gain that adds up. This is with our super-secret optimization turned OFF, which once enabled, will give a good 10+% performance increase on top of that. I/O performance drastically improved too: the read and write speeds to the SD cards, internal or external, more than doubled between the 3.12 and 5.7 kernels.

Some areas regressed, unfortunately. The upstream GPU kernel driver (etnaviv) along with the OpenGL ES layer (Mesa) that are used in the current development builds of OpenDingux have had a lot of fixes for crashes or graphical glitches, and is in many ways faster, but is also much slower than the old driver in some specific areas. With that said, the numbers of the old firmware should be taken with a grain of salt, since a lot of them are not rendering properly.

The new kernel comes with advanced debugging tools, like performance counters and debug overlays, so debugging the issue shouldn't be a problem, but that still has to be done. On the bright side, working close to upstream means that when we find the bottleneck, they will probably fix it for us.

ETA?

As usual, it is pretty difficult for me to give an estimate about when the next version of the firmware for all the supported OpenDingux devices will be ready. Working on OpenDingux always feels like taking two steps forward then one step back. The IPU issue with SDL is hopefully the last big rock to smash in what has been a very long and lonesome road. Then will come the testing phase, to be extra-careful that everything that used to work still works.

OpenDingux release 2020.01.06

Since last 2019.06.01 update, there has been reports of a lot of hangs and crashes that I could never manage to reproduce. The difference was that unlike most users, I don't use a micro SD and only have a handful of GBA games on the internal NAND. The bug turned out to be in the DMA driver, which caused data packets to be lost between the SD card controller and the card itself.

Changelog

  • Fixed DMA driver; using external micro SD cards won't cause crashes anymore.
  • Based on Linux v5.5-rc5 kernel and Buildroot 2019.11.
  • Small fixes to GMenu2X, nothing particularly noteworthy to report.
  • GMenu2X should now properly respawn when an app crashes.

Download links

The update OPK can be downloaded here: OpenDingux update OPK.
Be careful that you must have at least 25 MiB of internal storage before running the update.

For those who did not flash already, an updated flasher can be downloaded here: Flasher tool download

Special thanks

A big thanks to all those who donated. That was many more people than I thought. While I don't do this for the money, tips are always appreciated! Thank you!

OpenDingux release 2019.06.01

Another month, another update.

Changelog

  • Added USB mass storage mode (MTP). Finally, you can transfer your apps other files without any specific software! Use the 'USB Mode' app in the settings tab to revert to the Ethernet-over-USB mode that was the default in the previous versions of the firmware.
  • Added 20 MiB of in-RAM compressed swap (zram). This will permits some RAM-hungry apps to start, although with a performance hit vs. those who don't require swap.
  • Switched from mdev to udev, which fixes some issues, like the automounting of SD cards.
  • The brightness setting is now preserved across reboots.
  • And most importantly, the cow is back. Those who used to develop for OpenDingux on other devices will understand.

Download links

The update OPK can be downloaded here: OpenDingux update OPK.
Be careful that you must have at least 25 MiB of internal storage before running the update.

Enjoy!

OpenDingux release 2019.05.17

Just a small update to tell you I made a small update to the OpenDingux firmware for the RetroMini.

Changelog

  • V3.0 boards should be supported now. Run flash_v30.bat on Windows or flash_v30.sh on Linux to flash the device.
  • It is now possible to change the brightness level from within the settings panel.
  • The DMA is used for SD card transfers now, so these should be a bit faster.
  • The battery level should be a bit more accurate now.

Download links

The update OPK can be downloaded here: OpenDingux update OPK

For those who did not flash already, an updated flasher can be downloaded here: Flasher tool download

Enjoy!

OpenDingux release 2019.04.30

Hi folks,

Here is the first release of the official OpenDingux firmware for the RS-90 (RetroMini). The root FS is based on Buildroot 2019.02.1, the Linux kernel is based on 5.1-rc5.

Download links

The flasher can be downloaded here: Flasher tool download

The toolchain (for developers) can be downloaded here: Toolchain download

Additionally, for Windows users the drivers required for the flasher tool can be obtained here: Windows drivers download

All the sources can be found on the Github page of the OpenDingux project.

DISCLAIMER

Flashing OpenDingux to your RetroMini will permanently remove the native OS, all the games it contains, as well as your savegames. I cannot be held responsible for any damage that this software causes to your RetroMini device or the software it contains. Use it as your own risk.

How to flash

Attention: This flasher has been mostly tested under Linux, and it seems to be a hit-or-miss on Windows. If you cannot flash from Windows, try it from a Linux live-CD.
  1. With the device powered OFF, connect it to your PC through USB.
  2. Power it ON while pressing A. If done properly, the device will now be in USB Boot mode. On Windows, to continue to the following step you will need to have the driver properly installed.
  3. Extract the ZIP of the flasher tool to a directory. On Linux, run flash.sh from the terminal. On Windows, double-click on flash.bat.
  4. The RetroMini should power up, and show the welcome notice of the flasher tool. To continue, just follow the instructions. The flash operation should take a few minutes.
  5. After the installation completed and the device rebooted, OpenDingux has been successfully installed.

Usage

Those who already used a handheld running the official OpenDingux firmware (Dingoo A320 or GCW Zero) will feel at home. The firmware makes uses of the GMenu2X user interface, and OPKs as the format for the applications.

  • The firmware is standalone, and does not come with games nor emulators. These will need to be installed separately.
  • For file transfers, you can either use a FTP software and connect to 10.1.0.2 (anonymous login). Alternatively, you can use a SSH client and connect as the od user. The default password is odrocks.
  • The games or ROMs should be transferred somewhere inside the home directory or a subfolder. The OPK files must be placed inside the data/apps subfolder in order to appear in the menu.
  • The firmware supports overclocking the CPU. A list of frequencies are provided, from 216 MHz to 456 MHz, but I cannot guarantee that your RetroMini will be able to overclock that much. Mine does, though. To choose the frequency at which an application should run, select it in the menu, press SELECT then Edit; the frequency can be selected through the "Clock frequency" setting. Of course, overclocking will reduce the battery life. On the other hand, underclocking will increase the battery life. The default frequency is 360 MHz.

Final words

This project represents more than four hundred hours of work just on my side, all for free. If you value my work, please consider sending me a tip via PayPal using the "Donate" button on the top-right coner of my blog (or if you're on mobile, at the bottom of the page).

One picture is better than a thousand words

There are still some bugs here and there, but the kernel now supports all the hardware of the RS-90: mth got the LCD screen working, I worked on getting the sound output, USB networking, and NAND support in the bootloader, and zear worked on a ADC driver for the SELECT (and apparently, L) button, and a driver for the battery.

The focus now is to bring a GUI for this little handheld. We could use GMenu2X, but we need a new theme for the 240x160 screen. Also, we need to create an installer to automatize installation of the custom firmware from USB, just like in the good old Dingoo A320 days.

But now I can play PokĆ©mon again, and under ReGBA this time šŸ˜€

Saving my PokƩmons

The last few days Iā€™ve been toying with the possibility of installing OpenDingux directly on the internal NAND. What Iā€™ve been doing so far, was to boot the kernel from USB, and have it load the root filesystem (an unmodified OpenDingux rootfs for the Dingoo A320) from the SD card. It worked fine, but I had to unplug the SD card everytime I wanted to boot the kernel (required for booting over USB), and I didnā€™t like the idea of having proprietary software on the NAND.

Problem was, to be able to install OpenDingux on the NAND, I had to format the NAND first. And lose my savestate of PokƩmon Emerald, on which I spent more than 30 hours.

After figuring out the changes needed to the memory controller and the NAND controller, I was able to make a full dump of the NAND directly to the SD card, complete with Out-Of-Band (OOB) data (thatā€™s the part that contains meta-data, like error correction codes). I then got the BCH (error correction) controller to work, so I could make a dump of the NAND without the OOB.

The problem is that a dump of the NAND is useless if you donā€™t know how the data is stored.

NAND flashes are very prone to wear. Each eraseblock (128 KiB of data) can be written only about 1000 times before it starts to fail. To counter this issue, the OS has something called a Flash Translation Layer (FTL). It is basically a table that maps logical eraseblocks to physical eraseblocks. With the FTL, if you store a MP3 on the NAND, your OS will see the file as a continuous stream of bytes till the end of the file, but in reality each block of 128 KiB will be stored at a pseudo-random address somewhere in the whole NAND. If you overwrite the MP3 with another one, the fileā€™s data will appear at the same address, but the new data written will be stored in completely different eraseblocks. The FTL is then a mechanism to prevent the damage done to the eraseblocks by repeated writting to the same files.

Back to my problem. By hex-editing the NAND dump I figured that the filesystem used was FAT16; the problem was that the filesystem lies on top of a FTL, so it was cut in 128 KiB pieces scattered across the whole NAND. I had to figure out a way to map each physical eraseblock to a logical eraseblock. Sure enough, by spending some time hex-editing, I figured out that the first page of each eraseblock starting from address 0x20000 had incorrect error-correction data in its OOB area. By looking closer, I could figure out that one 32-bit word contained a different number for each erase block: most likely that value corresponded to the logical erase block that was mapped to that physical erase block. And sure enough, after modifying the FTL driver that was used on the Dingoo A320 to fit the Retrominiā€™s NAND, I could access the files and save my precious PokĆ©mons!

Now, to finish this post, I have a good news and a bad news.

Iā€™ll start with the good one: I cleaned and pushed my jz-4.18-retromini branch on Github. It contains all the work I did so far on the Retromini, including the FTL driver. By combining all the information Iā€™ve written in this blog so far, it should be possible for other people to boot their own kernels.

The bad news: I know that will deceive some, but I think Iā€™m done with this for this year. Iā€™m about to start a 1800km walk, then probably travel in Spain and South America for a bit. My Retromini will stay at home, like my laptop.

Till next time!

Linux on the Retromini

Time for a progress report.

I successfully booted a Linux kernel on the Retromini some weeks ago. I wonā€™t paste the whole kernel boot here, but you can read it by clicking here.

Since then, I"ve been adding support for the various hardware components of the Retromini in the upstream drivers if they exist, or writting new drivers otherwise.

Here is a list of the hardware components, and their current state:

UART Working Upstream
IRQ controller Working Upstream
PLL and Clocks Working Not upstream
Clocksource Working Sent upstream
System timer Working Sent upstream
Watchdog (reboot) Working Sent upstream
PWM (backlight) Working Sent upstream
RTC (power-off) Working Upstream
Pinctrl + GPIO Working Sent upstream
DMA Working Sent upstream
SD card Working Upstream
Memory controller Working Not Upstream
NAND Working Not Upstream
BCH (error correction for NAND) Working Not Upstream
Audio Not working
USB Ethernet / mass storage Not working
Buttons Working except SELECT Upstream
ADC (SELECT button) Not working
LCD Not working

If I find some time in the next few days, I will clean up and push on Github the current git tree Iā€™m working on.

Some things I thought Iā€™d share:

  • The JZ4725B SoC used by the Retromini is actually newer than the JZ4740. Some hardware blocks are more similar to the JZ4770 than the JZ4740.
  • The RTC does not retain the date across reboots. This sucks, as I wonā€™t be able to play PokĆ©mon games then, as they rely a lot on time. Maybe a hardware modification could make it work?
  • The buttons are for the most part GPIO-mapped. The R button is not available when serial logging is enabled, is it uses the same pin as RX. Also, for some reason the SELECT button is not GPIO-mapped, but connected to the Analog-to-Digital Converter (ADC). Whoever thought it was a good idea, should burn in hell.

Thatā€™s all folks!

UBIBoot on the RetroMini

Hello there,

For those who donā€™t know, I had written a bootloader called UBIBoot, quite a long time ago, for the Dingoo A320. As its name suggests, it supported booting from a UBI volume on the NAND. That is to say, it was able to boot a Linux kernel on the only Dingoo A320 with the internal NAND formatted as UBI: my own. I trashed the native OS and was running OpenDingux directly on the internal NAND.

The job of UBIBoot was to initialize the main PLL, the clocks, set the pins of the SoC in the right mode, initialize the SDRAM, initialize the NAND, initialize the SD card controller, and then finally, boot Linux from the first FAT partition of the SD card if thereā€™s one inserted, or from the ā€œkernelā€ UBI drive of the internal NAND.

All of that in about 5 kilobytes.

Before the GCW Zero came out, I got a prototype (with 256 MiB RAM), and ported UBIBoot to it. It then became the default and official bootloader for the GCW Zero when it was retailed months later.

Thereā€™s a fun story about it: the GCW Zero prototype didnā€™t have marks on the main board to show where the UART pads were, so I ported UBIBoot without having any output log: instead, I was blinking the LCD. My test passed? LCD turned on. It failed? The LCD remained off. Repeat for everything you need to test in your code. Next time it will be faster for me to learn Morse code and make the LCD blink Morse code to me šŸ™‚

Anyway, I disgress. I ported UBIBoot to the RetroMini, and the code is in the master branch now, which means itā€™s officially supported. The code is available here.

Note that right now, it only supports booting from an external micro-SD card. I did not try to flash it on the NAND; I want to dump the NAND before starting to overwrite it with random stuff.

To compile:
CONFIG=rs90 make

For the stage1 variant, where UBIBoot will only initialize the hardware then return to the USB loader:
CONFIG=rs90 STAGE1_ONLY=y make

Note that right now, itā€™s only useful for people with a UART cable soldered and who want to boot their own Linux kernel (or other operating system).

Next step: boot Linux!

Adding UART to the RetroMini

I recently bought a RetroMini.

For those who donā€™t know, the Retromini is a cheap ($25) chinese handheld gaming console, like there exist hundreds of variants.

What sets it apart, in my opinion, is that itā€™s perfectly tailored for emulating GameBoy and GameBoy Advance games. The D-pad and face buttons are the best ones Iā€™ve seen since the original GameBoy, and the screen is beautiful (I heard itā€™s actually the exact same screen as in the GBA Micro). The shape is also perfect, I donā€™t get cramps playing, which I had on the original GBA. The sound is good, the device is small enough to fit in a pocket (size of a GameBoy Pocket more or less). The only critic I have is for the L/R buttons, which are microswitches, and awkward to use. But I can live with that, Iā€™d mostly play PokĆ©mon anyway šŸ™‚

Besides, the reason I bought it isnā€™t really for playing GBA games, but because its System-on-chip (SoC), the central piece containing the processor and the device controllers, is an old Ingenic JZ4725B. Iā€™ve been playing with the JZ4740 on the Dingoo A320, the JZ4770 on the GCW Zero, and the JZ4780 on the MIPS Creator CI20, trying to upstream support for this SoC into the Linux kernel. Owning the RetroMini means I can test the drivers I write to one more Ingenic SoC, and start to support it upstream.

To write code for the RetroMini, I need two things:

  • a way to load my code into the RAM and have the CPU execute it;
  • a way to see what my code is actually doing.


Loading the code

Point 1). is easy; by powering ON the RetroMini while pressing B, the CPU will switch into a special mode where it will listen for commands on the USB bus. By sending specially crafted commands, it is possible to load custom code to the RetroMini. To make the process easier, I wrote a tool called jzboot that will upload the code to the RetroMini.


Debugging the code via UART

The simplest way to debug your code is to just make it print stuff to the output console. Print register contents, print ā€œsuccessā€ if your check worked, print ā€œoh noesā€ if it failedā€¦ If your program outputs text to the console, the whole process of writing a program becomes much easier.

The problem is getting the text output.

When you load code to the RetroMini, its hardware is in an uninitialized state; the RAM wonā€™t work, the micro SD wonā€™t work, and the LCD wonā€™t work. This means that unless you write code to initialize it, you wonā€™t be able to display text on the LCD. Thanksfully, there is another way, called UART. By connecting the TX and RX pins of the UART of the SoC  to an external UART receiver, we can receive on a PC the output of our program.

By looking at the datasheet (section 2.3.2) I could deduce that the TX pin was the pin number 58, and the RX pin was the pin number 57. Following closely the traces on the PCB (with a multimeter), I ended up soldering wires to the following points (click to enlarge):

You should connect these pins to a UART-to-USB adapter. Search for FTDI on your favourite online store. Here is an example: UART to USB adapter. The important thing is that it should work in 3.3V. Most of these modules come with a jumper to toggle between 5V and 3.3V I/O, it must be set to 3.3V if you donā€™t want to toast your RetroMini.

Then, solder the PCBā€™s TX to the adapterā€™s RX, the PCBā€™s RX to the adapterā€™s TX, and the two GND points together.


Making the RetroMini more retro

I didnā€™t want to solder my UART-to-USB module directly on the PCB, it wouldnā€™t look good and wouldnā€™t be practical should I want to actually play on the RetroMini. So I just drilled a hole on the back of the case and put a SUBD-9 connector there, the ā€œofficialā€ connector for UART:

Looks good right? šŸ˜‰

Next step: write some code!