
Adding UART to the RetroMini
I recently bought a RetroMini.
For those who don’t know, the Retromini is a cheap ($25) chinese handheld gaming console, like there exist hundreds of variants.
What sets it apart, in my opinion, is that it’s perfectly tailored for emulating GameBoy and GameBoy Advance games. The D-pad and face buttons are the best ones I’ve seen since the original GameBoy, and the screen is beautiful (I heard it’s actually the exact same screen as in the GBA Micro). The shape is also perfect, I don’t get cramps playing, which I had on the original GBA. The sound is good, the device is small enough to fit in a pocket (size of a GameBoy Pocket more or less). The only critic I have is for the L/R buttons, which are microswitches, and awkward to use. But I can live with that, I’d mostly play Pokémon anyway 🙂
Besides, the reason I bought it isn’t really for playing GBA games, but because its System-on-chip (SoC), the central piece containing the processor and the device controllers, is an old Ingenic JZ4725B. I’ve been playing with the JZ4740 on the Dingoo A320, the JZ4770 on the GCW Zero, and the JZ4780 on the MIPS Creator CI20, trying to upstream support for this SoC into the Linux kernel. Owning the RetroMini means I can test the drivers I write to one more Ingenic SoC, and start to support it upstream.
To write code for the RetroMini, I need two things:
- a way to load my code into the RAM and have the CPU execute it;
- a way to see what my code is actually doing.
Loading the code
Point 1). is easy; by powering ON the RetroMini while pressing B, the CPU will switch into a special mode where it will listen for commands on the USB bus. By sending specially crafted commands, it is possible to load custom code to the RetroMini. To make the process easier, I wrote a tool called jzboot that will upload the code to the RetroMini.
Debugging the code via UART
The simplest way to debug your code is to just make it print stuff to the output console. Print register contents, print “success” if your check worked, print “oh noes” if it failed… If your program outputs text to the console, the whole process of writing a program becomes much easier.
The problem is getting the text output.
When you load code to the RetroMini, its hardware is in an uninitialized state; the RAM won’t work, the micro SD won’t work, and the LCD won’t work. This means that unless you write code to initialize it, you won’t be able to display text on the LCD. Thanksfully, there is another way, called UART. By connecting the TX and RX pins of the UART of the SoC to an external UART receiver, we can receive on a PC the output of our program.
By looking at the datasheet (section 2.3.2) I could deduce that the TX pin was the pin number 58, and the RX pin was the pin number 57. Following closely the traces on the PCB (with a multimeter), I ended up soldering wires to the following points (click to enlarge):
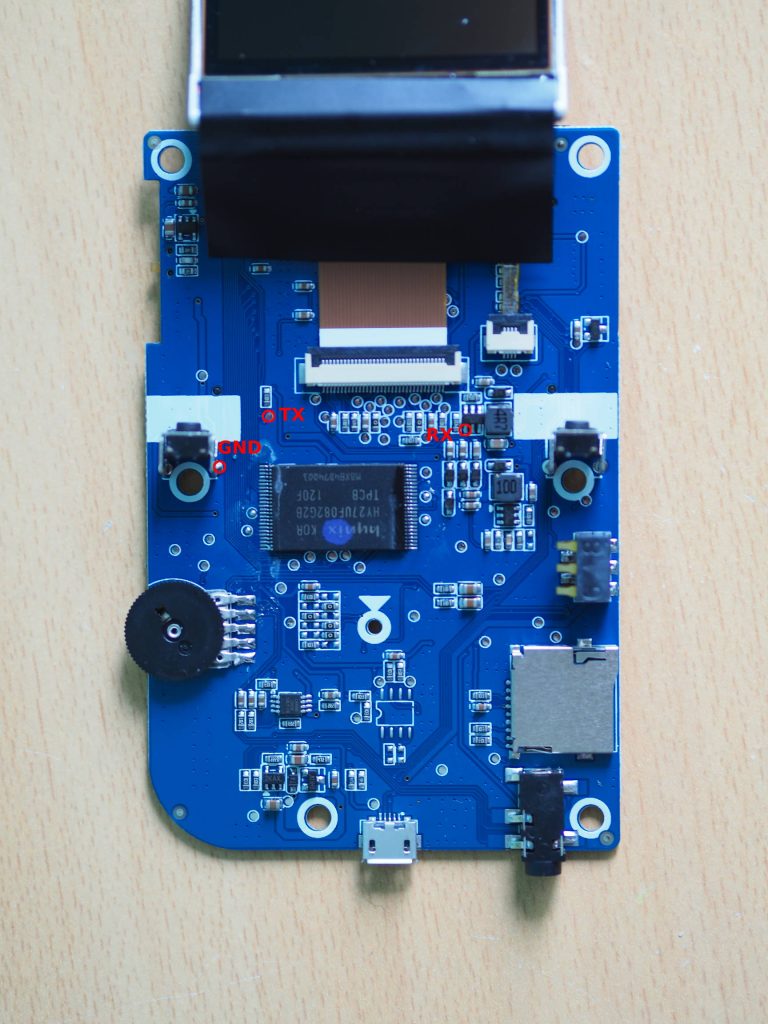
You should connect these pins to a UART-to-USB adapter. Search for FTDI on your favourite online store. Here is an example: UART to USB adapter. The important thing is that it should work in 3.3V. Most of these modules come with a jumper to toggle between 5V and 3.3V I/O, it must be set to 3.3V if you don’t want to toast your RetroMini.
Then, solder the PCB’s TX to the adapter’s RX, the PCB’s RX to the adapter’s TX, and the two GND points together.
Making the RetroMini more retro
I didn’t want to solder my UART-to-USB module directly on the PCB, it wouldn’t look good and wouldn’t be practical should I want to actually play on the RetroMini. So I just drilled a hole on the back of the case and put a SUBD-9 connector there, the “official” connector for UART:
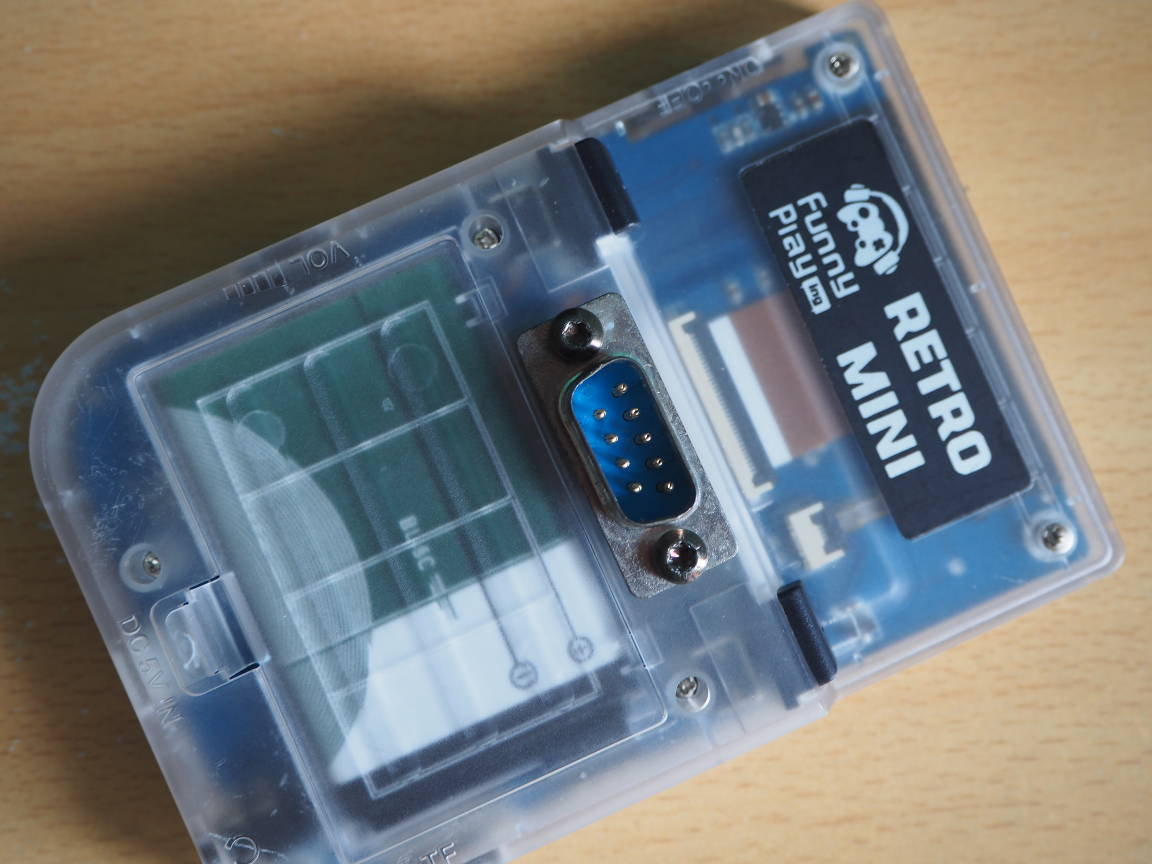
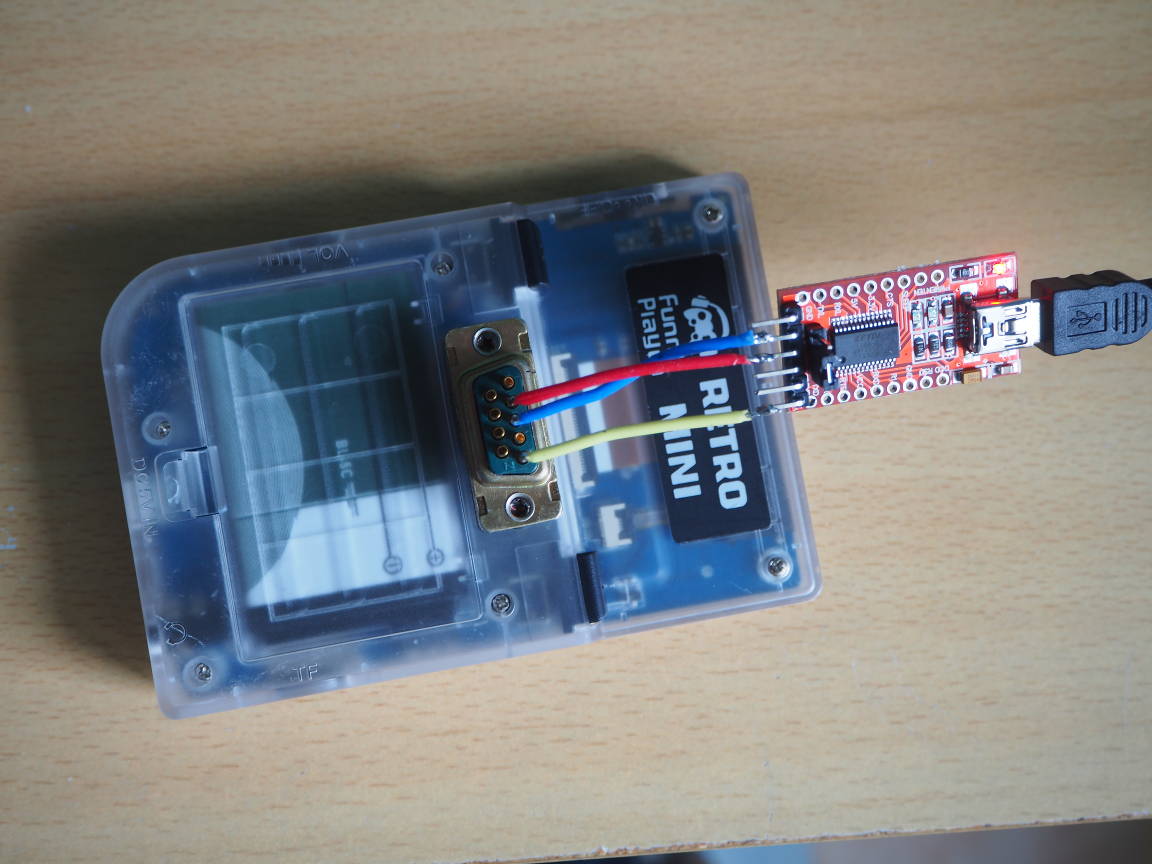
Looks good right? 😉
Next step: write some code!