Linux on the Retromini

Time for a progress report.

I successfully booted a Linux kernel on the Retromini some weeks ago. I won’t paste the whole kernel boot here, but you can read it by clicking here.

Since then, I"ve been adding support for the various hardware components of the Retromini in the upstream drivers if they exist, or writting new drivers otherwise.

Here is a list of the hardware components, and their current state:

UART Working Upstream
IRQ controller Working Upstream
PLL and Clocks Working Not upstream
Clocksource Working Sent upstream
System timer Working Sent upstream
Watchdog (reboot) Working Sent upstream
PWM (backlight) Working Sent upstream
RTC (power-off) Working Upstream
Pinctrl + GPIO Working Sent upstream
DMA Working Sent upstream
SD card Working Upstream
Memory controller Working Not Upstream
NAND Working Not Upstream
BCH (error correction for NAND) Working Not Upstream
Audio Not working
USB Ethernet / mass storage Not working
Buttons Working except SELECT Upstream
ADC (SELECT button) Not working
LCD Not working

If I find some time in the next few days, I will clean up and push on Github the current git tree I’m working on.

Some things I thought I’d share:

  • The JZ4725B SoC used by the Retromini is actually newer than the JZ4740. Some hardware blocks are more similar to the JZ4770 than the JZ4740.
  • The RTC does not retain the date across reboots. This sucks, as I won’t be able to play Pokémon games then, as they rely a lot on time. Maybe a hardware modification could make it work?
  • The buttons are for the most part GPIO-mapped. The R button is not available when serial logging is enabled, is it uses the same pin as RX. Also, for some reason the SELECT button is not GPIO-mapped, but connected to the Analog-to-Digital Converter (ADC). Whoever thought it was a good idea, should burn in hell.

That’s all folks!

UBIBoot on the RetroMini

Hello there,

For those who don’t know, I had written a bootloader called UBIBoot, quite a long time ago, for the Dingoo A320. As its name suggests, it supported booting from a UBI volume on the NAND. That is to say, it was able to boot a Linux kernel on the only Dingoo A320 with the internal NAND formatted as UBI: my own. I trashed the native OS and was running OpenDingux directly on the internal NAND.

The job of UBIBoot was to initialize the main PLL, the clocks, set the pins of the SoC in the right mode, initialize the SDRAM, initialize the NAND, initialize the SD card controller, and then finally, boot Linux from the first FAT partition of the SD card if there’s one inserted, or from the “kernel” UBI drive of the internal NAND.

All of that in about 5 kilobytes.

Before the GCW Zero came out, I got a prototype (with 256 MiB RAM), and ported UBIBoot to it. It then became the default and official bootloader for the GCW Zero when it was retailed months later.

There’s a fun story about it: the GCW Zero prototype didn’t have marks on the main board to show where the UART pads were, so I ported UBIBoot without having any output log: instead, I was blinking the LCD. My test passed? LCD turned on. It failed? The LCD remained off. Repeat for everything you need to test in your code. Next time it will be faster for me to learn Morse code and make the LCD blink Morse code to me 🙂

Anyway, I disgress. I ported UBIBoot to the RetroMini, and the code is in the master branch now, which means it’s officially supported. The code is available here.

Note that right now, it only supports booting from an external micro-SD card. I did not try to flash it on the NAND; I want to dump the NAND before starting to overwrite it with random stuff.

To compile:
CONFIG=rs90 make

For the stage1 variant, where UBIBoot will only initialize the hardware then return to the USB loader:
CONFIG=rs90 STAGE1_ONLY=y make

Note that right now, it’s only useful for people with a UART cable soldered and who want to boot their own Linux kernel (or other operating system).

Next step: boot Linux!

Adding UART to the RetroMini

I recently bought a RetroMini.

For those who don’t know, the Retromini is a cheap ($25) chinese handheld gaming console, like there exist hundreds of variants.

What sets it apart, in my opinion, is that it’s perfectly tailored for emulating GameBoy and GameBoy Advance games. The D-pad and face buttons are the best ones I’ve seen since the original GameBoy, and the screen is beautiful (I heard it’s actually the exact same screen as in the GBA Micro). The shape is also perfect, I don’t get cramps playing, which I had on the original GBA. The sound is good, the device is small enough to fit in a pocket (size of a GameBoy Pocket more or less). The only critic I have is for the L/R buttons, which are microswitches, and awkward to use. But I can live with that, I’d mostly play Pokémon anyway 🙂

Besides, the reason I bought it isn’t really for playing GBA games, but because its System-on-chip (SoC), the central piece containing the processor and the device controllers, is an old Ingenic JZ4725B. I’ve been playing with the JZ4740 on the Dingoo A320, the JZ4770 on the GCW Zero, and the JZ4780 on the MIPS Creator CI20, trying to upstream support for this SoC into the Linux kernel. Owning the RetroMini means I can test the drivers I write to one more Ingenic SoC, and start to support it upstream.

To write code for the RetroMini, I need two things:

  • a way to load my code into the RAM and have the CPU execute it;
  • a way to see what my code is actually doing.


Loading the code

Point 1). is easy; by powering ON the RetroMini while pressing B, the CPU will switch into a special mode where it will listen for commands on the USB bus. By sending specially crafted commands, it is possible to load custom code to the RetroMini. To make the process easier, I wrote a tool called jzboot that will upload the code to the RetroMini.


Debugging the code via UART

The simplest way to debug your code is to just make it print stuff to the output console. Print register contents, print “success” if your check worked, print “oh noes” if it failed… If your program outputs text to the console, the whole process of writing a program becomes much easier.

The problem is getting the text output.

When you load code to the RetroMini, its hardware is in an uninitialized state; the RAM won’t work, the micro SD won’t work, and the LCD won’t work. This means that unless you write code to initialize it, you won’t be able to display text on the LCD. Thanksfully, there is another way, called UART. By connecting the TX and RX pins of the UART of the SoC  to an external UART receiver, we can receive on a PC the output of our program.

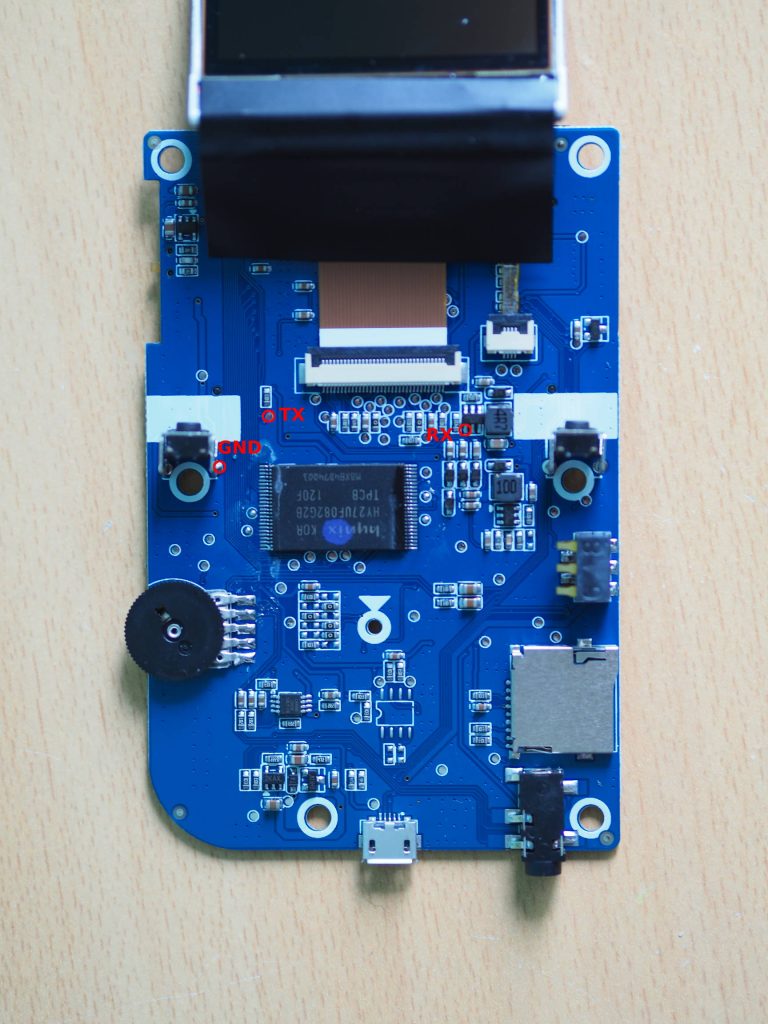
By looking at the datasheet (section 2.3.2) I could deduce that the TX pin was the pin number 58, and the RX pin was the pin number 57. Following closely the traces on the PCB (with a multimeter), I ended up soldering wires to the following points (click to enlarge):

You should connect these pins to a UART-to-USB adapter. Search for FTDI on your favourite online store. Here is an example: UART to USB adapter. The important thing is that it should work in 3.3V. Most of these modules come with a jumper to toggle between 5V and 3.3V I/O, it must be set to 3.3V if you don’t want to toast your RetroMini.

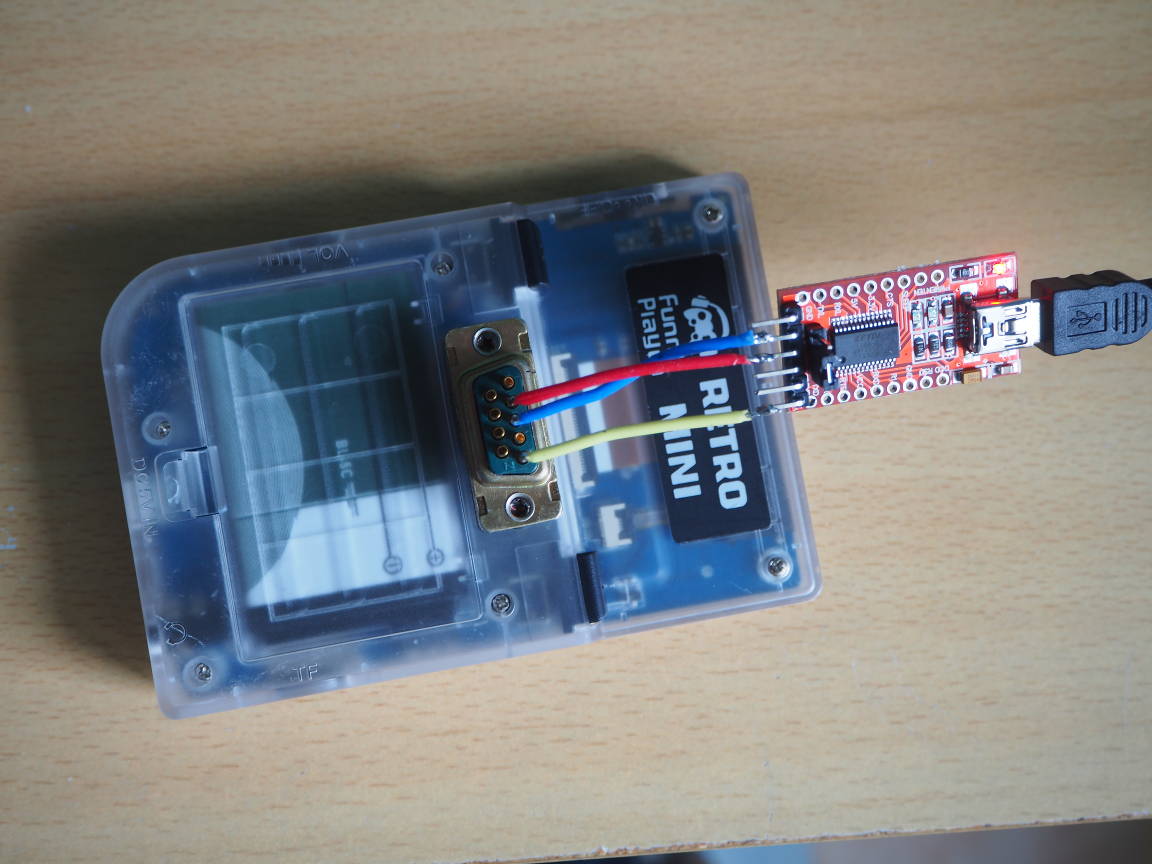
Then, solder the PCB’s TX to the adapter’s RX, the PCB’s RX to the adapter’s TX, and the two GND points together.


Making the RetroMini more retro

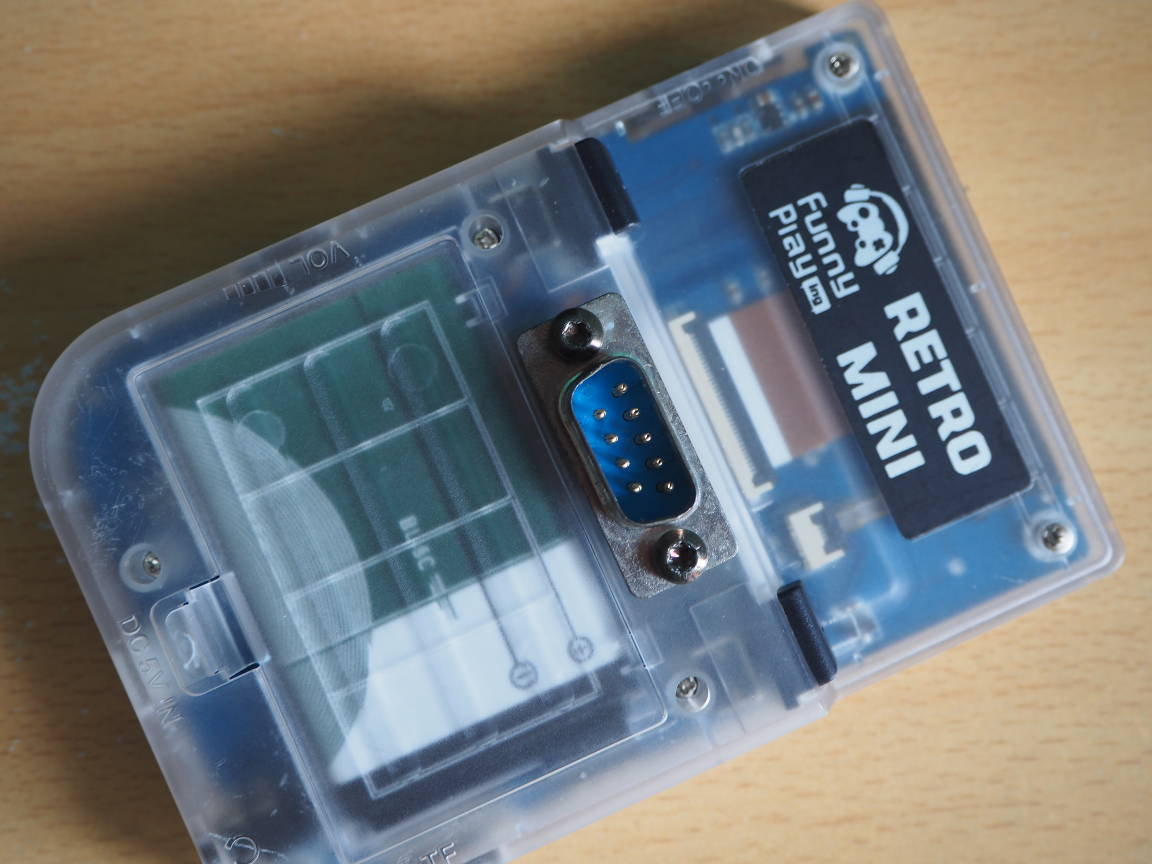
I didn’t want to solder my UART-to-USB module directly on the PCB, it wouldn’t look good and wouldn’t be practical should I want to actually play on the RetroMini. So I just drilled a hole on the back of the case and put a SUBD-9 connector there, the “official” connector for UART:

Looks good right? 😉

Next step: write some code!

Hello World!

Welcome to my devblog!

I’ve been thinking for some time about starting it; not that I like much to write about what I do, but I’ve been hacking some pretty amazing stuff, and won decent knowledge about programming languages, electronics, low-level magic, operating systems and device drivers development, Linux kernel hacking, dynamic code recompilation… that it would be sad not to write about my experience and my experiments as I go.

So buckle your seatbelt, we’re going for a ride into my world, and it’s going to get bumpy.